
A new type of task : Assignment
Tutorial PlanningPME
Contents
2 - How do I activate the Assignments ?
3 - Add, modify or delete Assignments
4 - Creating
5 - Display assignments of a department only
6 - Intuitive typing
7 - Create some tasks and appointments within an assignment
8 - Access rights to assignments defined per user
9 - Rename "Assignment" with your own words
1 - Definition
We now have a new kind of task named "assignment" that allow you to add another dimension to the schedule. Indeed, you can define where your employees work every days and then, within the assignment, you can schedule appointments. For example, if you need to manage medical appointments with doctors on different hospitals, you can first define on which hospital each doctor should work each day and then, create appointments within this assignment. Then you can create appointments within each assignment.
2 - How do I activate the Assignments ?
First, activate the option from the menu Parameters -> Options -> Data and select "Activate assignments".
You now have a menu "Assignment" under "Data":
3 - Add, modify or delete Assignments
To define a new assignment, press the button "Add".
You can then type a label for example "Hospital Chocolate" and define if this new assignment will be available for all departments or only some of them. So, on the planning, if you have writing rights on one department only, then only assignments defined for this department will be available while creating a new "assignment" on the planning board.
To change the text and background color, select the label on the list and change the colours directly from the "text" and "background" colours buttons at the bottom of the window.
To modify an assignment, double click on it on the list or right click and select "Modify".
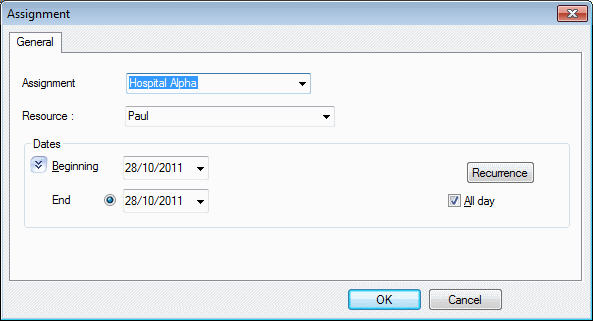
4 - Creating
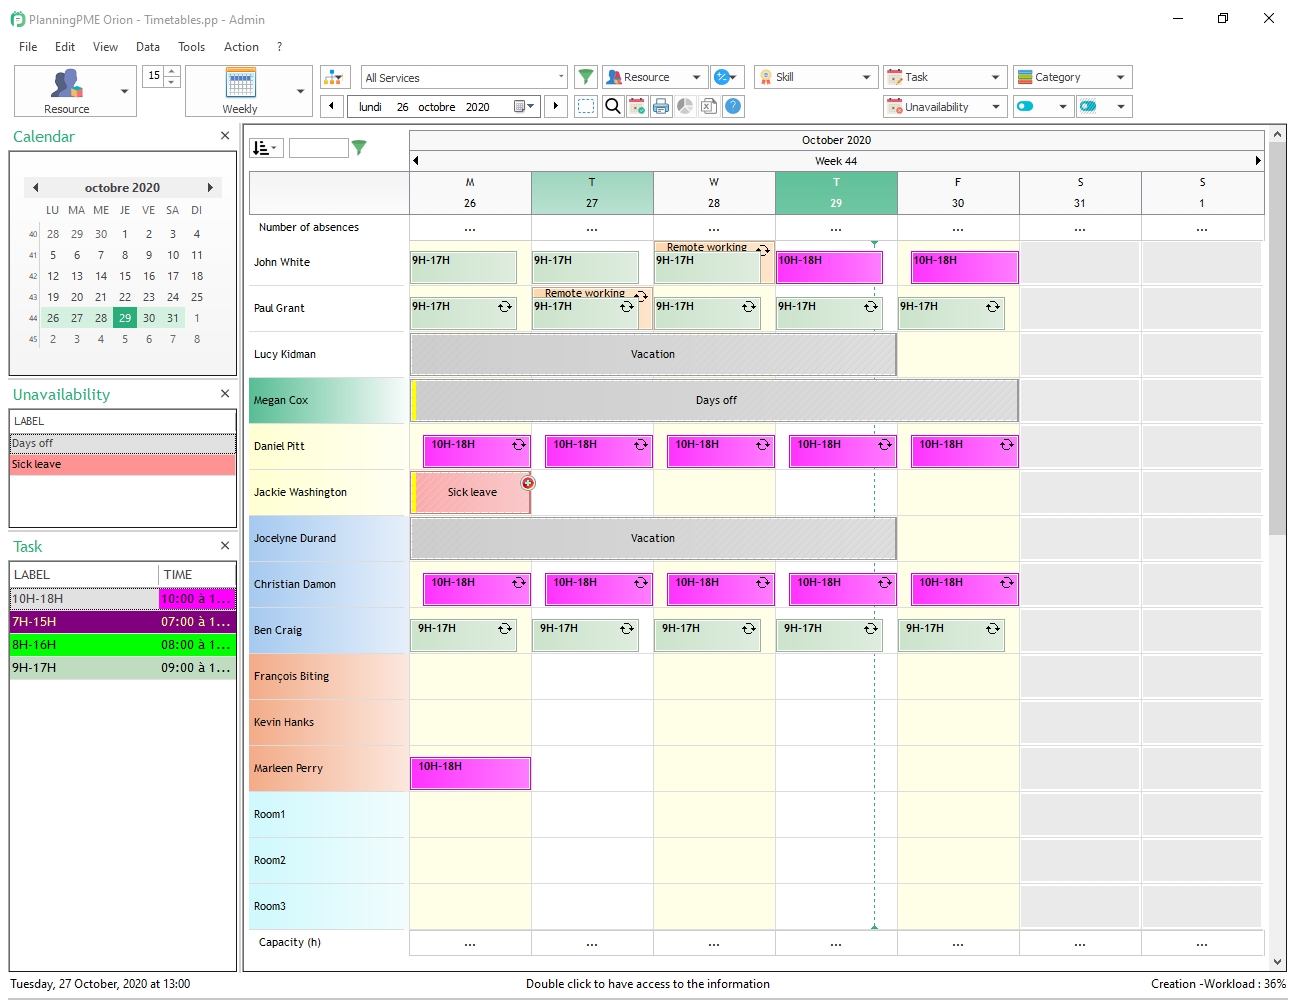
On the schedule, an assignment will be represented by a coloured rectangle with dash dots as lines. To create a new "assignment", right click on the planning board and select "New assignment".
The "Assignment" window will then open. You can select a label on the drop down list or type directly a new label here. If you type a new label, it will be recorded on the menu Data -> Assignment.
Then, you can define beginning and end dates and time and even create a recurrent event if needed.
To modify an assignment, double click on it on the list or right click and select "Modify".
To delete an assignment, select it from the list and then press "Delete".
To copy an assignment, right click on it and select "copy" and then paste it with a right click and then "Paste" on another day and/or resource.
5 - Display assignments of a department only
As mentioned earlier, you can define an assignment to one or more departments. Then, when filtering on one department on the planning board, when you create a new "assignment" only assignments of this department will appear on the drop down list.
6 - Intuitive typing
Intuitive typing (autocompletion) is also activated on the drop down list of assignments. When typing the beginning of a label, the program now suggests some of the labels pre-registered in order to save time.
7 - Create some tasks and appointments within an assignment
You can then create some new appointments within this assignment drawing a box with your mouse.
8 - Access rights to assignments defined per user
With the users rights management, you can define who can manage assignments: add, modify or delete rights.
9 - Rename "Assignment" with your own words
From the menu "Tools" -> "Language", you can rename those words to customise them to your activity. You can name it for example location or shift.